Pages

Showing posts with label Aws. Show all posts

Saturday, November 21, 2015

How To Grant Access To Only One S3 Bucket Using AWS IAM Policy

Click on “My Account/Console” and select “Security Credentials”.

Select “Continue to Security Credentials”.

Select “Policies” on the left menu, then click “Create Policy”.

Select “Create Your Own Policy”.

Fill out the “Policy Name”, “Description” and “Policy Document” fields.
Replace “YOUR-BUCKET” in the example below with your bucket name.
Please note that we set “ListAllMyBuckets” to list all buckets owned by you, so that tools that lists buckets will work.

NOTE: If you explicitly list out the actions for your bucket, please also include
"s3:GetBucketLocation" so that ObjectiveFS can select the right S3 endpoint to talk with.
Example policy:
{
    "Version": "2012-10-17",
    "Statement": [
        {
            "Effect": "Allow",
            "Action": [
                        "s3:GetBucketLocation",
                        "s3:ListAllMyBuckets"
                      ],
            "Resource": "arn:aws:s3:::*"
        },
        {
            "Effect": "Allow",
            "Action": "s3:*",
            "Resource": [
                "arn:aws:s3:::YOUR-BUCKET",
                "arn:aws:s3:::YOUR_BUCKET/*"
            ]
        }
    ]
}


Tuesday, October 27, 2015

Monday, October 12, 2015

AWS S3 : Limiting Access from Certain IP's

We need to our nodes to connect to S3 from a single IP address, an elastic IP attached to our gateway node.

So - based on this design, we needed a way to only allow access to a set of buckets from this single IP address. For example purposes we are using the IP of 72.309.38.2.

IF you were to follow the initial example laid out by the AWS documentation - you’ll end up with a policy that probably looks similar to this.

{
    "Id": "S3PolicyId1",
    "Statement": [
        {
            "Sid": "IPAllow",
            "Effect": "Allow",
            "Principal": {
                "AWS": "*"
            },
            "Action": "s3:*",
            "Resource": "arn:aws:s3:::my-wicked-awesome-bucket/*",
            "Condition": {
                "IpAddress": {
                    "aws:SourceIp": "72.309.38.2/32"
                }
            }
        }
    ]
}

What you’re going to find, after banging your head on the table a few times, is that this policy does not work. There does not appear to be an implied deny rule with S3 buckets (similar to how IAM access policies are setup). I did my testing with the s3-curl command - When you have that tool setup - you can make a query like the following:


./s3curl.pl --head --id=AKIAYOURACCESSKEY --key=YourSecretKey -- https://s3.amazonaws.com/my-wicked-awesome-bucket/even-more-awesome.file
Using the policy above - returned this:

HTTP/1.1 200 OK
x-amz-id-2: BLPqeibX8nZGnSDNi9zRhb+6a8fDiOW6Ij1OXhadWknJKCX9WAb7x1xNETvdXAEv
x-amz-request-id: F6AF36D912E6003B
Date: Fri, 27 Apr 2012 00:25:52 GMT
Last-Modified: Tue, 17 Apr 2012 17:50:11 GMT
ETag: "8553074962ba71d8b2b600b971ba80a8"
Accept-Ranges: bytes
Content-Type: application/pdf
Content-Length: 1451065
Server: AmazonS3
After troubleshooting this with the AWS support team - they let me know of the following:

By default accounts are restricted from accessing S3 unless they have been given access via policy. However, S3 is designed by default to allow any IP address access. So to block IP's you would have to specify denies explicitly in the policy instead of allows.

Once I learned this - the policy was easy to adjust. I flipped around the policy from allowing access from only my IP address to denying access from everywhere that was NOT my IP address.

My new policy looked like this:

{
    "Id": "S3PolicyId1",
    "Statement": [
        {
            "Sid": "IPDeny",
            "Effect": "Deny",
            "Principal": {
                "AWS": "*"
            },
            "Action": "s3:*",
            "Resource": "arn:aws:s3:::my-wicked-awesome-bucket/*",
            "Condition": {
                "NotIpAddress": {
                    "aws:SourceIp": "72.309.38.2/32"
                }
            }
        }
    ]
}

And when I ran my s3-curl command again - I now received the following response.

HTTP/1.1 403 Forbidden
x-amz-request-id: 3B90483F655AA692
x-amz-id-2: 0XEO2miEzZEwbU2N5zPwzLtX4J7BJx/LLXpvSLPpQ7e2wuocx49katsD+ZcqwYA7
Content-Type: application/xml
Transfer-Encoding: chunked
Date: Fri, 27 Apr 2012 00:27:14 GMT
Server: AmazonS3

Friday, May 9, 2014

AWS IAM- Identity and Access Management

An AWS account has full permission to perform all actions on the vaults in the account. However, the AWS Identity and Access Management (IAM) users don't have any permission by default.

IAM helps us to securely control access to Amazon Web Services and your account resources. With IAM, you can create multiple IAM users under the umbrella of your AWS account.

Every user you create in the IAM system starts with no permissions. In other words, by default, users can do nothing. Permission is a general term we use to mean the ability to perform an action against a resource, unless you explicitly grant a user permissions, that user cannot perform any of these actions. You grant permission to a user with a policy. A policy is a document that formally states one or more permissions.

IAM Users

An IAM user is an entity that you create in AWS that provides a way to interact with AWS. A primary use for IAM users is to give people you work with identities that they can use to sign in to the AWS Management Console and to make requests to AWS services.

AWS IAM GROUP.

group is a collection of IAM users. Groups let you specify permissions for a collection of users, which can make it easier to manage the permissions for those users. For example, you could have a group called Admins and give that group the types of permissions that administrators typically need. Any user in that group automatically has the permissions that are assigned to the group. If a new user joins your organization and should have administrator privileges, you can assign the appropriate permissions by adding the user to that group. Similarly, if a person changes jobs in your organization, instead of editing that user's permissions, you can remove him or her from the old group and add him or her to the new group.

IAM_Group


Creating a Group with needed Privileges.

Entering the Group Name

IAM_Group-00

Selecting Permissions

Aws provides a set of custom permission templates which we can use. The custom template provided by the Aws covers all the services in the AWS.
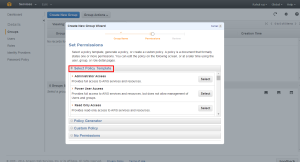
IAM_Group-00-Policy-section-00

We can also generate Custom Policies with the help of Policy Generator

IAM_Group-00-Policy-Generator-00

First select the service of which we need to create Policies.

IAM_Group-00-Policy-Generator-01


Select the permission’s we need to add into the Policies
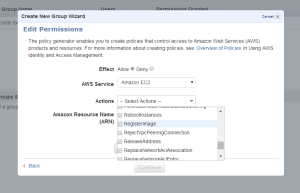
IAM_Group-00-Policy-Generator-03

The Amazon Resource Name  : This gives the API details about the service ,region, resource account ect.


Arn format

==========

arn:aws:service:region:account:resource

arn:aws:service:region:account:resourcetype/resource

arn:aws:service:region:account:resourcetype:resource


More details can be found at

http://docs.aws.amazon.com/general/latest/gr/aws-arns-and-namespaces.html

IAM_Group-00-Policy-Generator-04

Once the ARN is added we can Add Statement so that we can see the rule’s added.

IAM_Group-00-Policy-Generator-05


Now we will be able to see the policy codes which if needed we can use for create custom Policies.
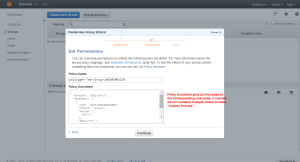
IAM_Group-00-Policy-Generator-06

Creating the Group

IAM_Group-00-Policy-Generator-07


Creating the User

IAM_User-00

Keep the Access Key ID and Secret Key safe because this is the last time you will see it in AWS. AWS will not save them for you. But you can create as many keys you need.

IAM_User-01


Adding the User to Group

Right click on the needed user to get more options.

IAM_User-01-togroup-00

Select the required Group

IAM_User-01-togroup-01

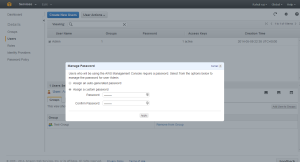
Once the group is added we need to give the user a password

IAM_User-01-password-setting-00

Assign the needed Password

IAM_User-01-password-setting-01


The Group and password are set for the User.
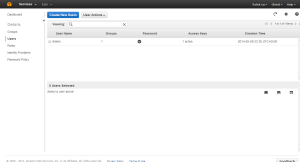
IAM_User-01-password-setting-02


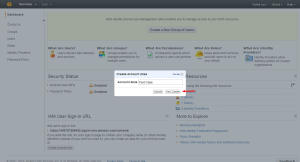
Once the User is set we can set the IAM URL alias

IAM-URL

Give the needed Alias

IAM-URL-Alias


The URL is set.

IAM-URL-Alias-01


Now you can use the URL to access the IAM login portal.